
Build video chat application with WebRTC

Hey reader, welcome back to my blog, in this article we would be building a real-time video calling application using something known as WebRTC.
Now, what is webRTC? In simple terms, webRTC refers to as web real-time communications. You can use webRTC to design video calling, audio calling, and chatting applications on the web.
Do you know what's the best part about WebRTC? The answer is, you don't need any backend to handle the communications. This means that two or more people are having video calls without any server, how? because WebRTC is implemented inside your browser. Isn't interesting? So, let's build our own video call application.
Note: As I have mentioned we don't need any backend, that does not mean that we are not going to have any type of backend. We need a backend at an initial point just to connect them both initially. after that, you can even stop your server but the video call would go on. I hope you got the point.
Technologies we would be using
- Node.js & Express
- Socket.io
- A good browser (Chrome, Firefox)
Setup
Let's begin to set up our project. Create an empty folder naming video-app and initialize package.json by running npm init -y.
Now, let's install express and socket.io by running
npm install express socket.io
{
  "name": "video-call",
  "version": "1.0.0",
  "description": "A simple video calling application",
  "main": "index.js",
  "scripts": {
    "start": "node index.js"
  },
  "keywords": [],
  "author": "Piyush Garg",
  "license": "ISC",
  "dependencies": {
    "express": "^4.17.1",
    "socket.io": "^4.1.2"
  }
}
don't forget to add the start script in package.json.
Good going, now let's create a index.js file on the server and start coding along with me.
// index.js

const http = require('http');
const express = require('express');
const { Server: SocketIO } = require('socket.io');
const path = require('path');

const app = express();
const server = http.createServer(app);

const io = new SocketIO(server);
const PORT = process.env.PORT || 8000;

app.use(express.static( path.resolve('./public') ));

server.listen(PORT, () => console.log(`Server started at PORT:${PORT}`));
let's try to run our server with npm start.
Server started at PORT:8000
Cool 😎
Now let's start adding event listeners to our socket.io
// index.js

const http = require('http');
const express = require('express');
const { Server: SocketIO } = require('socket.io');
const path = require('path');

const app = express();
const server = http.createServer(app);

const io = new SocketIO(server);
const PORT = process.env.PORT || 8000;

io.on('connection', socket => {
    console.log(`user connected: ${socket.id}`);


    socket.on('disconnect', () => {
        console.log(`user disconnected: ${socket.id}`);
    });
});


app.use(express.static( path.resolve('./public') ));

server.listen(PORT, () => console.log(`Server started at PORT:${PORT}`));
Okay, you are really fast at learning. Now create a folder named public on your server and create a index.html file. This is the file where all our front-end code goes.
node_modules/
public
     | index.html
index.js
package-lock.json
package.json
index.html
<!DOCTYPE html>
<html lang="en">
<head>
    <meta charset="UTF-8">
    <meta http-equiv="X-UA-Compatible" content="IE=edge">
    <meta name="viewport" content="width=device-width, initial-scale=1.0">
    <title>My Video App</title>
</head>
<body>

</body>
</html>
Now, things become a little serious, before moving further I want you to understand some basic terms
- RTCPeerConnection – creates and navigates peer-to-peer connections.
- RTCSessionDescription – describes one end of a connection (or a potential connection) and how it’s configured.
What is a peer? A peer is a node or a user connected to webRTC.
Flow of WebRTC
The flow of webRTC is simple, yet confusing. Once you understand this flow, whoa you know webRTC. I don't expect that you would understand this in one go, so please read this topic 2-3 times.
To understand the flow of WebRTC, let's take the real-life situations on how it works.
There are 2 online users named A and B. A wants to call B, so first of all A would create an offer and send it to B via socket.io. B would then accept the offer sent by A and after accepting the offer, B will create an answer and send back the answer to A via socket.io. This process is called signaling .
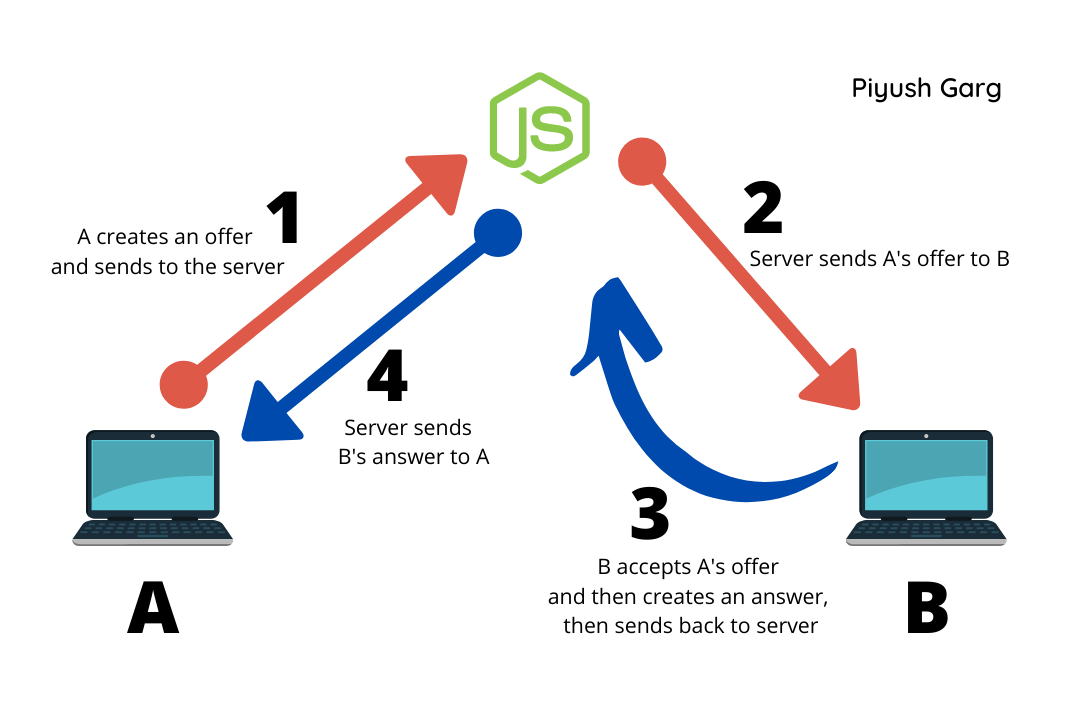
Did you understand that? If not, please read that again slowly. If yes, please read that carefully.
Now, let's code the above situation to make things more sensual.
On the server index.js
// create a users map to keep track of users
const users = new Map();
socket.on('outgoing:call', data => {
     const { fromOffer, to } = data;
     socket.to(to).emit('incomming:call', { from: socket.id, offer: fromOffer });
});
In the above code sample, to refers to the id of B.
So, basically in the above implementation, whenever a client emits an outgoing call event to someone our server would emit the incoming call event for the client who is being called along with the offer. I hope it makes sense to you.
Now, let's code when B accepts the call and sends back the answer to the server.
socket.on('call:accepted', data => {
     const { answere, to } = data;
     socket.to(to).emit('incomming:answere', { from: socket.id, offer: answere })
});
In this case, to refers to the id of A.
Complete index.js code.
// index.js

const http = require('http');
const express = require('express');
const { Server: SocketIO } = require('socket.io');
const path = require('path');

const app = express();
const server = http.createServer(app);

const io = new SocketIO(server);
const PORT = process.env.PORT || 8000;

// Create a users map to keep track of users
const users = new Map();

io.on('connection', socket => {
    console.log(`user connected: ${socket.id}`);
    users.set(socket.id, socket.id);

    // emit that a new user has joined as soon as someone joins
    socket.emit('user:joined', socket.id);

    socket.on('outgoing:call', data => {
        const { fromOffer, to } = data;

        socket.to(to).emit('incomming:call', { from: socket.id, offer: fromOffer });
    });

    socket.on('call:accepted', data => {
        const { answere, to } = data;
        socket.to(to).emit('incomming:call', { from: socket.id, offer: answere })
    });


    socket.on('disconnect', () => {
        console.log(`user disconnected: ${socket.id}`);
        users.delete(socket.id);
    });
});


app.use(express.static( path.resolve('./public') ));

server.listen(PORT, () => console.log(`Server started at PORT:${PORT}`));
Good job, lets move further and code our front-end part where we would be creating and accepting these offers.
<!-- Import socket.io script -->
<script src="/socket.io/socket.io.js"></script>
Complete html code
<!DOCTYPE html>
<html lang="en">
    <head>

        <link rel="stylesheet" href="style.css">

        <meta charset="UTF-8">
        <meta http-equiv="X-UA-Compatible" content="IE=edge">
        <meta name="viewport" content="width=device-width, initial-scale=1.0">
        <title>My Video App</title>
    </head>
    <body>

        <div>
                <h3>Your Id: <span id="myId"></span></h3>
                <h3>Online Users (click to connect)</h3>
                <div id="users">

                </div>
                <video id="local-video"></video>
                <video id="remote-video"></video>
            </div>
            </div>
            <p id="status"></p>
        </div>

        <!-- Import socket.io script -->
        <script src="/socket.io/socket.io.js"></script>

        <script>
            const socket = io();
        </script>
    </body>
</html>
also, add the following CSS styles
body {
    font-family: Arial, Helvetica, sans-serif;
}

button {
    padding: 10px 20px;
    border-radius: 10px;
    border: 1px solid;
    cursor: pointer;
    display: block;
    margin-top: 10px;
}

#local-video {
    position: absolute;
    border: 2px solid green;
    height: 250px;
    width: 250px;
    top: 20px;
    right: 20px
}

#remote-video {
    position: absolute;
    border: 2px solid blue;
    height: 550px;
    width: 550px;
    top: 20px;
    right: 300px
}

#status {
    position: absolute;
    bottom: 30px;
    font-size: 20px;
    left: 30px;
}
Start the server npm start and go to http://localhost:8000
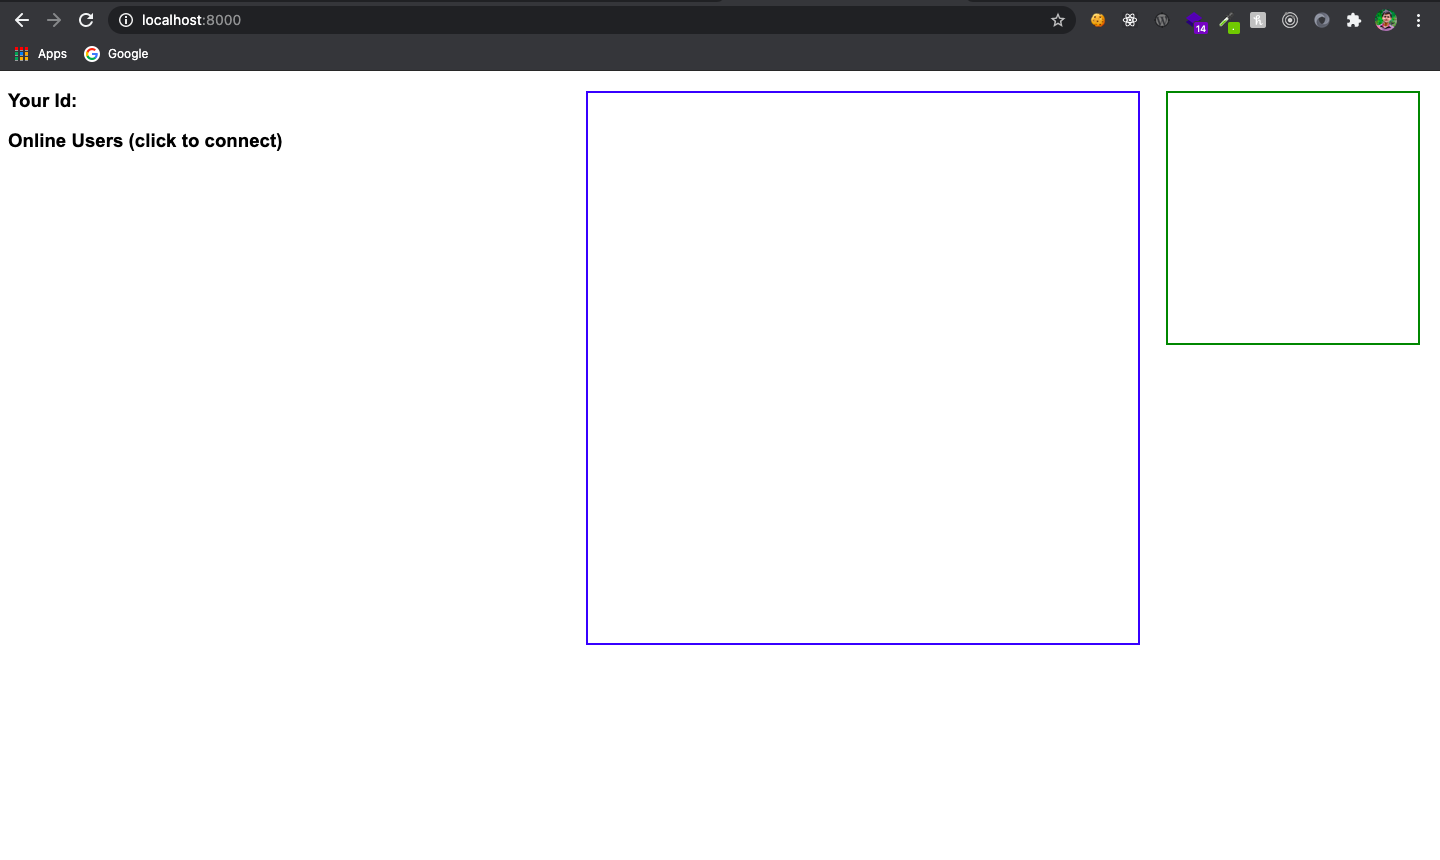
Okay, please don't judge my front end. I know it's horrible. 🥲
Displaying online users
Firstly, create a route on the backend that gets the users from the user Map and sends them as json.
app.get('/users', (req, res) => {
    return res.json(Array.from(users));
});
Great, let's fetch users on the front end.
index.html
<script>
            const socket = io();

            const getAndUpdateUsers = async () => {
                const usersDiv = document.getElementById('users');

                const response = await fetch('/users', { method: 'GET' });
                const jsonResponse = await response.json();

                console.log(jsonResponse)

                jsonResponse.forEach(user => {
                    const btn = document.createElement('button');
                    const textNode = document.createTextNode(user[0]);

                    btn.setAttribute('onclick', `createCall('${user[0]}')`);
                    btn.appendChild(textNode);
                    usersDiv.appendChild(btn);
                });
            }


            socket.on('user:joined', (id) => {
                const usersDiv = document.getElementById('users');
                const btn = document.createElement('button');
                const textNode = document.createTextNode(id);

                btn.appendChild(textNode);
                btn.setAttribute('onclick', `createCall('${id}')`);
                usersDiv.appendChild(btn);
            })

            window.addEventListener('load', getAndUpdateUsers);
        </script>
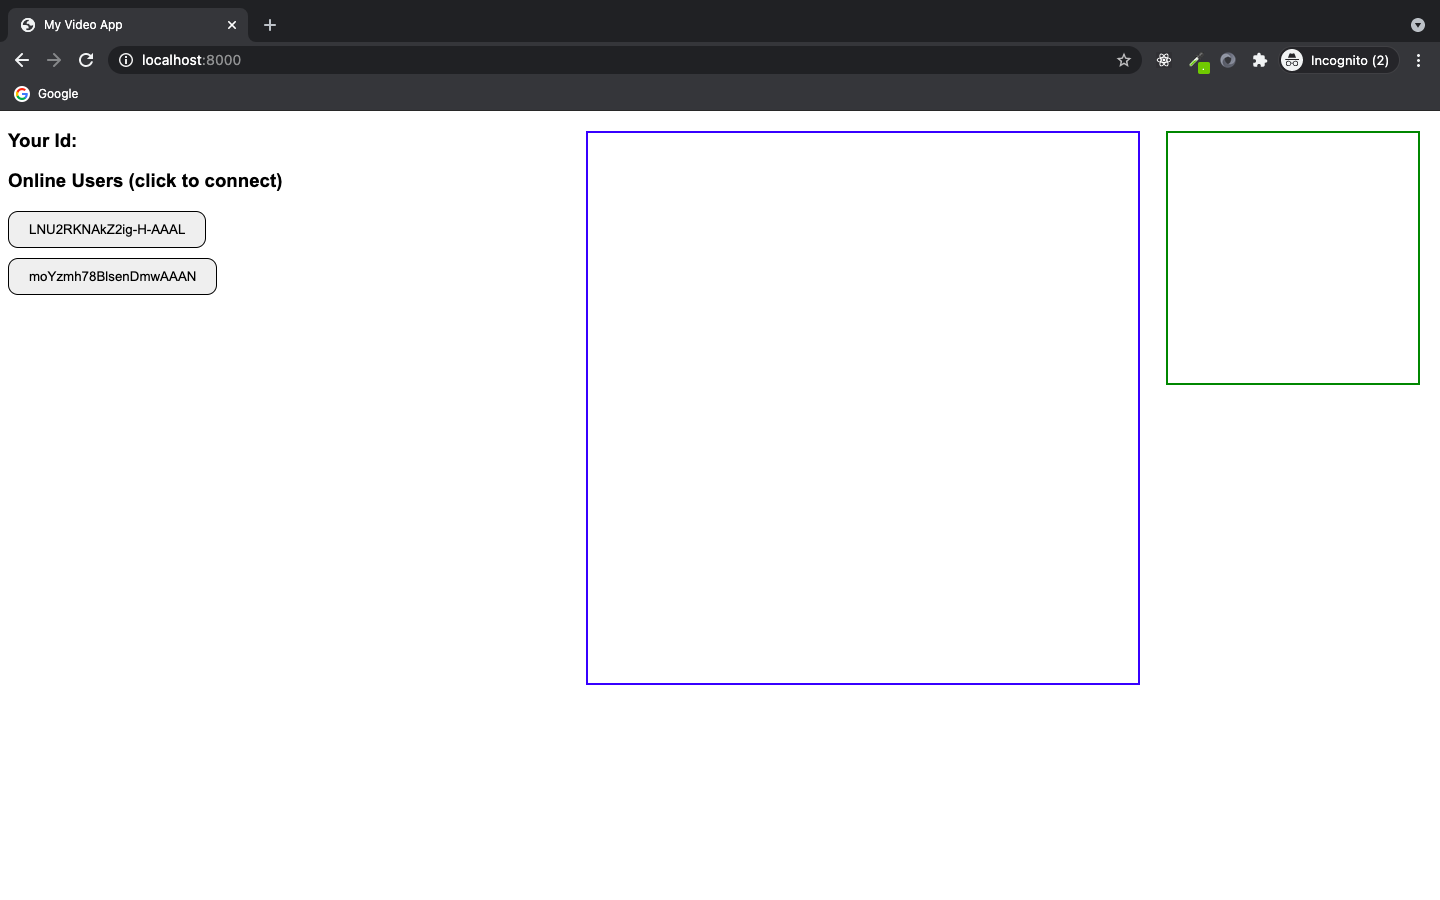
As you can see, I have opened http://localhost:8000 on three different tabs, and I got 3 buttons.
Now, create a peer object.
const peer = new RTCPeerConnection({
    iceServers: [
        {
            urls: "stun:stun.stunprotocol.org"
        }
    ]
});
and define a function createCall
const createCall = async (to) => {
         const status = document.getElementById('status');
         status.innerText = `Calling ${to}`;

         const localOffer = await peer.createOffer();
         await peer.setLocalDescription(new RTCSessionDescription(localOffer));

         socket.emit('outgoing:call', { fromOffer: localOffer, to })
}
Great, now let's add a listener for incoming: call
socket.on('incomming:call', async data => {
         const { from, offer } = data;

         await peer.setRemoteDescription(new RTCSessionDescription(offer));

         const answereOffer = await peer.createAnswer();
         await peer.setLocalDescription(new RTCSessionDescription(answereOffer));

         socket.emit('call:accepted', { answere: answereOffer, to: from });
})
and finally, a listener for incoming: answer
socket.on('incomming:answere', async data => {
       const { offer } = data;
       await peer.setRemoteDescription(new RTCSessionDescription(offer));
});
Great, Now finally get the user's video via webcam and share them.
So, firstly get the user's video and display it on screen.
const getUserMedia = async () => {
     const userMedia = await navigator.mediaDevices.getUserMedia({
            video: true,
     });

      const videoEle = document.getElementById('local-video');
      videoEle.srcObject = userMedia;
      videoEle.play()
 }
Refresh the tab, and you would see something like this.
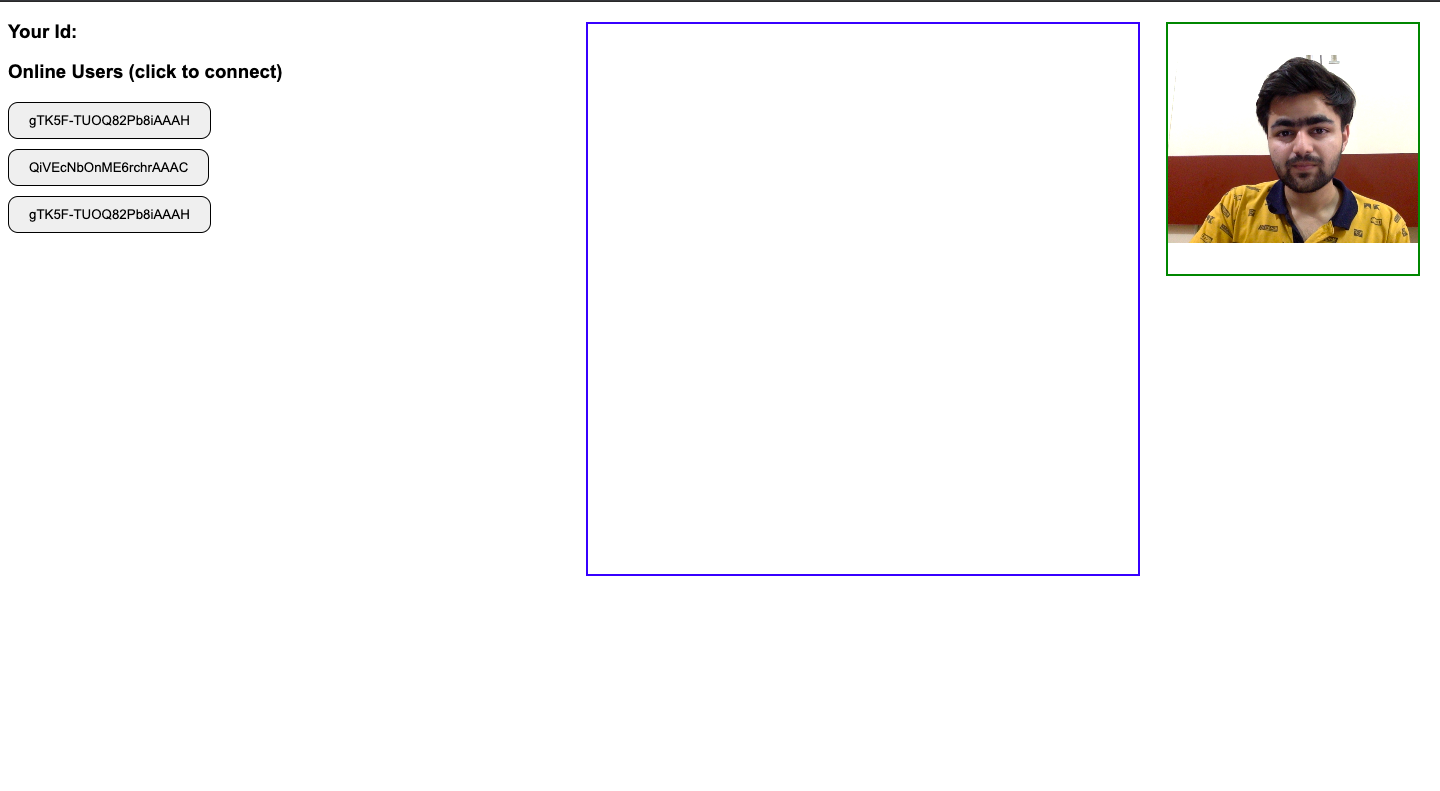
Okay, now we have to share this so-called media stream with our remote user.
Inside incoming: call listener. I have added code to share the stream.
socket.on('incomming:call', async data => {
                const status = document.getElementById('status');
                status.innerText = 'incomming:call';

                const { from, offer } = data;

                await peer.setRemoteDescription(new RTCSessionDescription(offer));

                const answereOffer = await peer.createAnswer();
                await peer.setLocalDescription(new RTCSessionDescription(answereOffer));

                socket.emit('call:accepted', { answere: answereOffer, to: from });
                const mySteam = await navigator.mediaDevices.getUserMedia({
                    video: true,
                });

                for (const track of mySteam.getTracks()) {
                    peer.addTrack(track, mySteam);
                }
            })
and finally, add a listener on incoming streams
peer.ontrack = async ({streams: [stream]}) => {

       const status = document.getElementById('status');
       status.innerText = 'Incomming Stream';

        console.log(stream)

         const video = document.getElementById('remote-video');
         video.srcObject = stream;
         video.play();

         const mySteam = await navigator.mediaDevices.getUserMedia({
                  video: true,
         });

         for (const track of mySteam.getTracks()) {
                 peer.addTrack(track, mySteam);
         }

 }
And you are done. Try to open this app on 2 tabs and call each other.
Note: I have made very minor changes such as disconnecting the user and displaying my own id. I would recommend you implement that of your own. Anyways I have pasted the complete code below.
Happy learning 🚀
Complete Code:
Server: index.js
// index.js

const http = require('http');
const express = require('express');
const { Server: SocketIO } = require('socket.io');
const path = require('path');

const app = express();
const server = http.createServer(app);

const io = new SocketIO(server);
const PORT = process.env.PORT || 8000;

// Create a users map to keep track of users
const users = new Map();

io.on('connection', socket => {
    console.log(`user connected: ${socket.id}`);
    users.set(socket.id, socket.id);

    // emit that a new user has joined as soon as someone joins
    socket.broadcast.emit('users:joined', socket.id);
    socket.emit('hello', { id: socket.id });

    socket.on('outgoing:call', data => {
        const { fromOffer, to } = data;

        socket.to(to).emit('incomming:call', { from: socket.id, offer: fromOffer });
    });

    socket.on('call:accepted', data => {
        const { answere, to } = data;
        socket.to(to).emit('incomming:answere', { from: socket.id, offer: answere })
    });


    socket.on('disconnect', () => {
        console.log(`user disconnected: ${socket.id}`);
        users.delete(socket.id);
        socket.broadcast.emit('user:disconnect', socket.id);
    });
});


app.use(express.static( path.resolve('./public') ));

app.get('/users', (req, res) => {
    return res.json(Array.from(users));
});

server.listen(PORT, () => console.log(`Server started at PORT:${PORT}`));
HTML: index.html
<!DOCTYPE html>
<html lang="en">
    <head>

        <link rel="stylesheet" href="style.css">

        <meta charset="UTF-8">
        <meta http-equiv="X-UA-Compatible" content="IE=edge">
        <meta name="viewport" content="width=device-width, initial-scale=1.0">
        <title>My Video App</title>
    </head>
    <body>

        <div>
                <h3>Your Id: <span id="myId"></span></h3>
                <h3>Online Users (click to connect)</h3>
                <div id="users">

                </div>
                <video id="local-video"></video>
                <video id="remote-video"></video>
            </div>
            </div>
            <p id="status"></p>
        </div>

        <!-- Import socket.io script -->
        <script src="/socket.io/socket.io.js"></script>

        <script>
            const socket = io();

            const peer = new RTCPeerConnection({
                iceServers: [
                    {
                        urls: "stun:stun.stunprotocol.org"
                    }
                ]
            });

            const createCall = async (to) => {
                const status = document.getElementById('status');
                status.innerText = `Calling ${to}`;

                const localOffer = await peer.createOffer();
                await peer.setLocalDescription(new RTCSessionDescription(localOffer));

                socket.emit('outgoing:call', { fromOffer: localOffer, to });
            }

            peer.ontrack = async ({streams: [stream]}) => {

                const status = document.getElementById('status');
                status.innerText = 'Incomming Stream';

                console.log(stream)

                const video = document.getElementById('remote-video');
                video.srcObject = stream;
                video.play();

                const mySteam = await navigator.mediaDevices.getUserMedia({
                    video: true,
                });

                for (const track of mySteam.getTracks()) {
                    peer.addTrack(track, mySteam);
                }

            }

            socket.on('users:joined', (id) => {
                const usersDiv = document.getElementById('users');
                const btn = document.createElement('button');
                const textNode = document.createTextNode(id);

                btn.id = id;

                btn.setAttribute('onclick', `createCall('${id}')`);
                btn.appendChild(textNode);
                usersDiv.appendChild(btn);
            });


            socket.on('incomming:answere', async data => {
                const status = document.getElementById('status');
                status.innerText = 'incomming:answere';

                const { offer } = data;
                await peer.setRemoteDescription(new RTCSessionDescription(offer));
            });

            socket.on('user:disconnect', id => {
                document.getElementById(id).remove()
            })

            socket.on('incomming:call', async data => {
                const status = document.getElementById('status');
                status.innerText = 'incomming:call';

                const { from, offer } = data;

                await peer.setRemoteDescription(new RTCSessionDescription(offer));

                const answereOffer = await peer.createAnswer();
                await peer.setLocalDescription(new RTCSessionDescription(answereOffer));

                socket.emit('call:accepted', { answere: answereOffer, to: from });
                const mySteam = await navigator.mediaDevices.getUserMedia({
                    video: true,
                });

                for (const track of mySteam.getTracks()) {
                    peer.addTrack(track, mySteam);
                }
            })

            const getAndUpdateUsers = async () => {
                const usersDiv = document.getElementById('users');
                usersDiv.innerHTML = ''

                const response = await fetch('/users', { method: 'GET' });
                const jsonResponse = await response.json();

                console.log(jsonResponse)

                jsonResponse.forEach(user => {
                    const btn = document.createElement('button');
                    const textNode = document.createTextNode(user[0]);

                    btn.id = user[0];

                    btn.setAttribute('onclick', `createCall('${user[0]}')`);
                    btn.appendChild(textNode);
                    usersDiv.appendChild(btn);
                });
            }

            socket.on('hello', ({ id }) => document.getElementById('myId').innerText = id)


            const getUserMedia = async () => {
                const userMedia = await navigator.mediaDevices.getUserMedia({
                    video: true,
                });

                const videoEle = document.getElementById('local-video');
                videoEle.srcObject = userMedia;
                videoEle.play()
            }


            window.addEventListener('load', getAndUpdateUsers);
            window.addEventListener('load', getUserMedia);
        </script>
    </body>
</html>
CSS: style.css
body {
    font-family: Arial, Helvetica, sans-serif;
}

button {
    padding: 10px 20px;
    border-radius: 10px;
    border: 1px solid;
    cursor: pointer;
    display: block;
    margin-top: 10px;
}

#local-video {
    position: absolute;
    border: 2px solid green;
    height: 250px;
    width: 250px;
    top: 20px;
    right: 20px
}

#remote-video {
    position: absolute;
    border: 2px solid blue;
    height: 550px;
    width: 550px;
    top: 20px;
    right: 300px
}

#status {
    position: absolute;
    bottom: 30px;
    font-size: 20px;
    left: 30px;
}
Comments
Join the discussionGreat blog Piyush , right now we are working on webrtc only for voice call feature , this blog literally helped us alot, Thank you.
when i host this on VPS the camera isnt working
Thanks
I like this article, If possible please make a video on this. Thank You
Piyush sir muje bs local video dish rhi h , remote video vale section m to kuch show nhi hora. help me sir
Hello Piyush Bhaiya !! i loved reading through your webRTC blog and got to learn a lot from it
But, i found bugs when i tried it out
Problem #1 The two peers are getting connected via the websockets once i click the button that triggers the createCall function but the streaming does'nt seem to happen when i try to connect with a device on the same LAN
Problem #2 When i tried out the web application in my laptop it is working for two different tabs in same browser but only when i click the button two times that invokes the createCall function. Not Sure why it happens ...
I tried a alot debugging the code and also added the code to exchange ICEcandidates but nothing seems to work.
Requesting you to help me out of this problem, your help will be much appreciated.
Curious about other methods, certainly, this one is quite easy and reliable. For custom video chats and similar programs, our university group used Vonage. But assignments and customwritings were done with JavaScript + WebRTC too.
WebRTC - Web real-time communications
With WebRTC, you can add real-time communication capabilities to your application that works on top of an open standard.


