
Express and MongoDB

Hey there, In this article, I would be teaching you how to use MongoDB with express.js and perform CRUD operations.
What is MongoDB?
MongoDB is a no-SQL database. It is a general-purpose, document-based, distributed database built for modern application developers and for the cloud era.
MongoDB stores the data as form of document inside collections.
For Example: If I have a record of 5 students, So I can say that I have 5 documents inside a collection named as students.
I hope you got the point. 😄
Note: In this tutorial, I will be using MongoDB atlas to avoid the complexities faced while installing MongoDB and it would also be easier for beginners to understand too. MongoDB Atlas is a cloud service to use mongoDb.
Let’s Begin
Step 0: Create an account on MongoDB
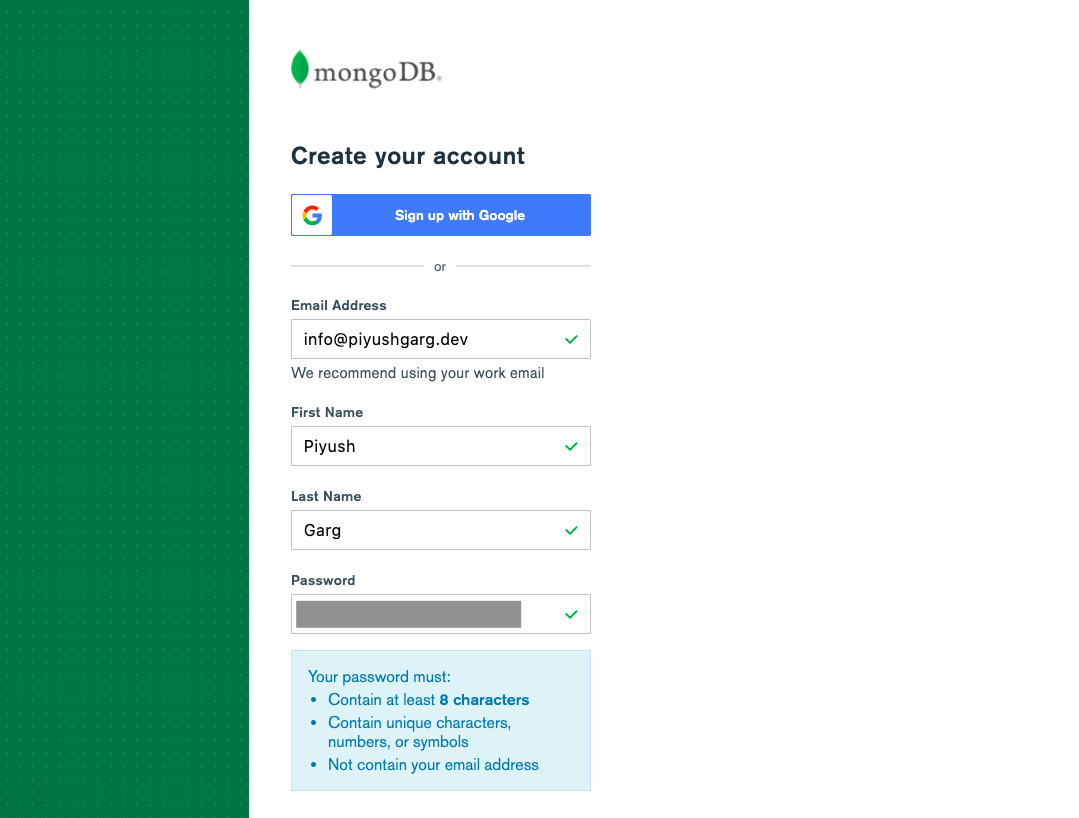
Head over to https://www.mongodb.com/ and create your free account to use MongoDB atlas.


After creating your account, choose free cluster and click on create a cluster
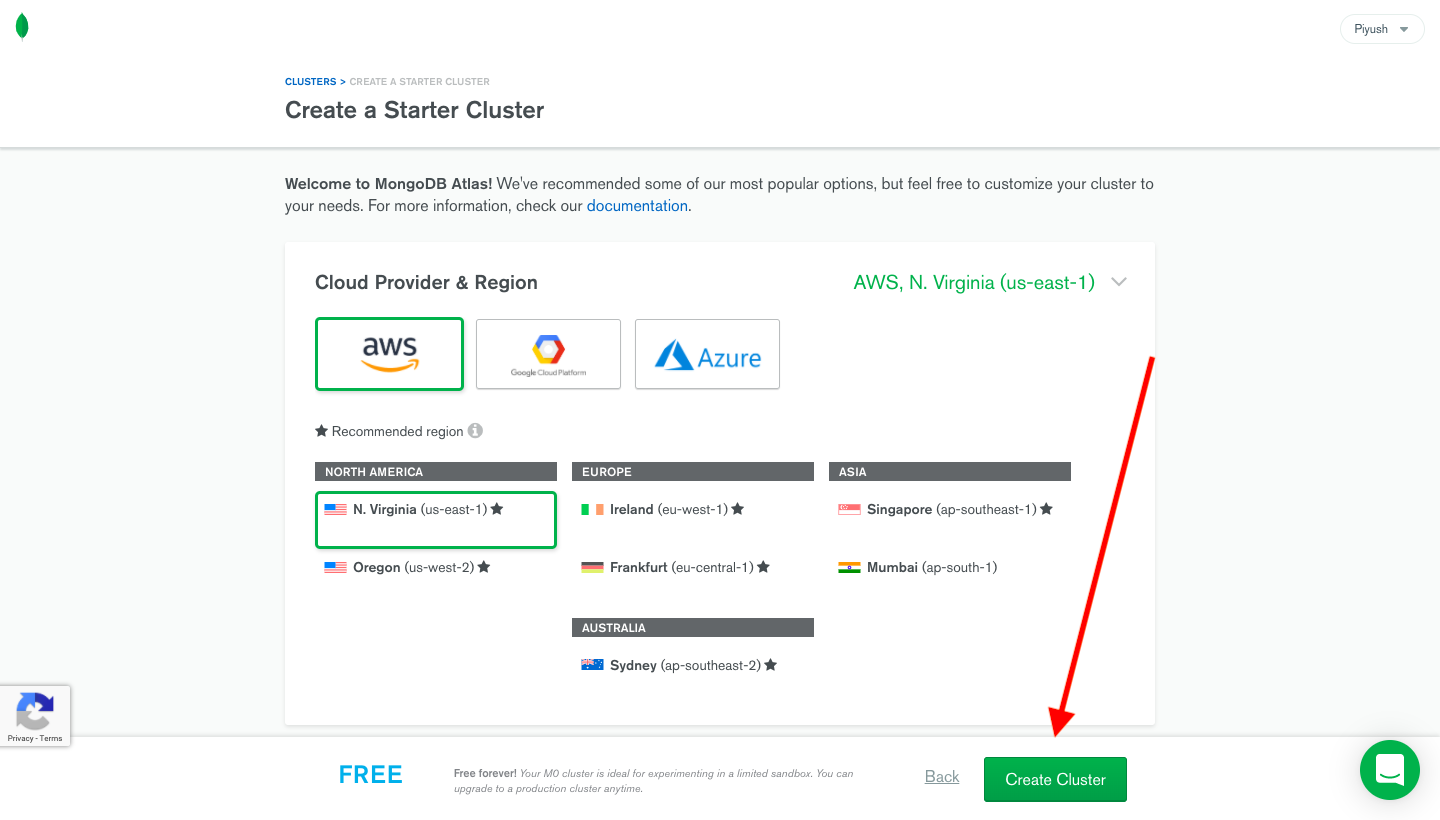

Now, wait for 2–3 minutes for the cluster to get deployed.
Congrats! You have successfully deployed your cluster and now we are ready to move on to next step. 🎉
Step1: Configuring MongoDB Atlas
There are a couple of tweaks here and there which we need to follow to get started with MongoDB Atlas.
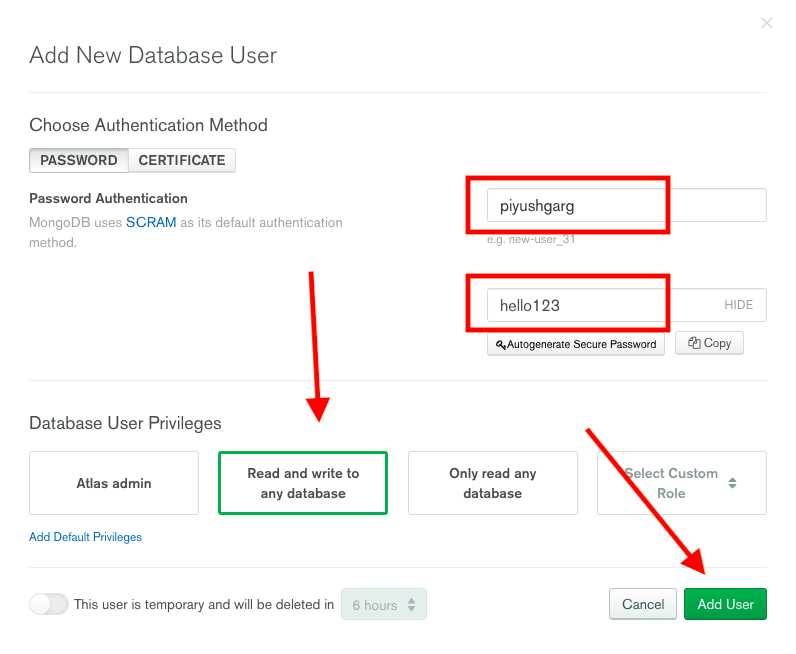
Creating a user role to access the database from our application
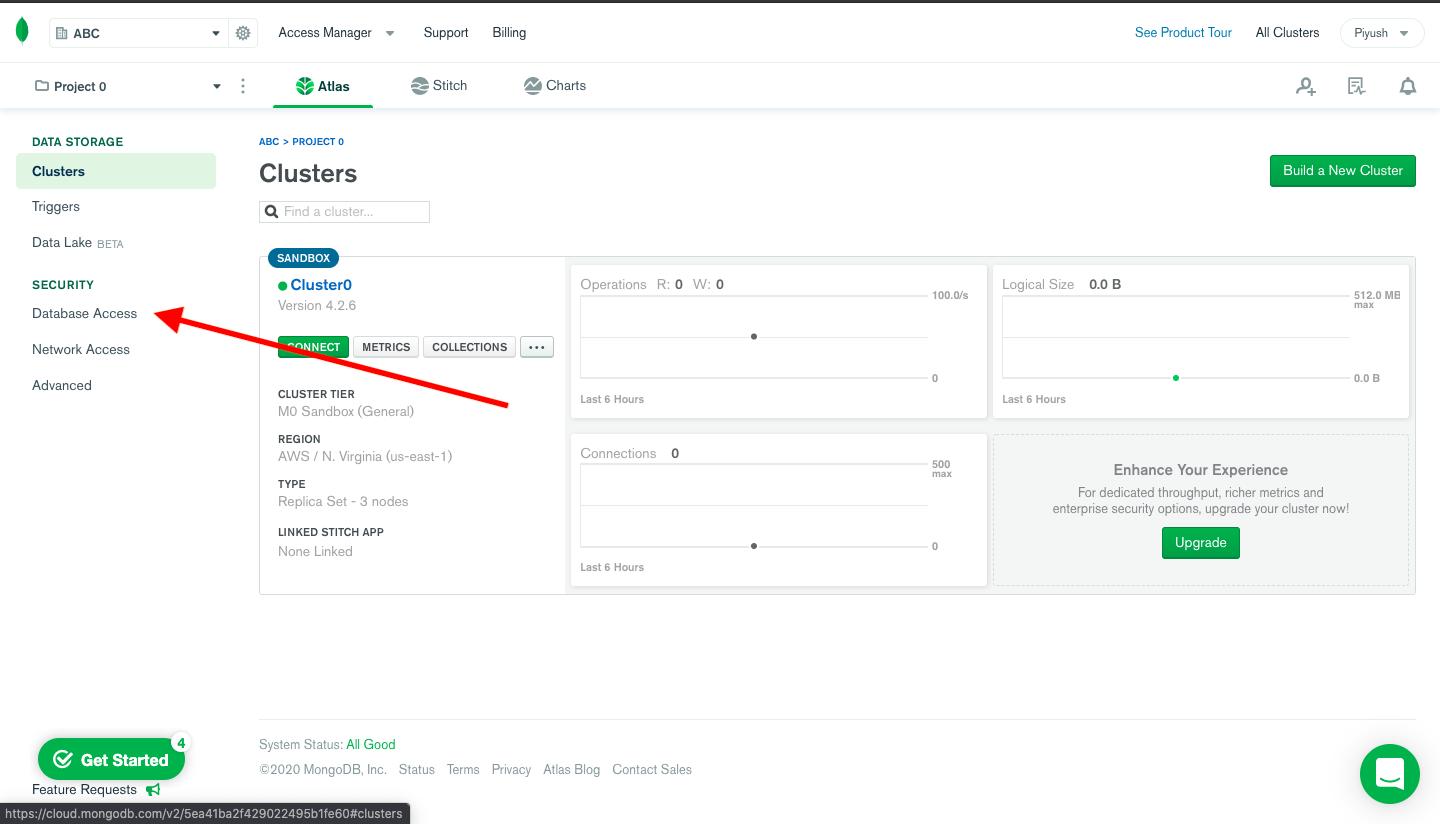 Navigate to Database Access
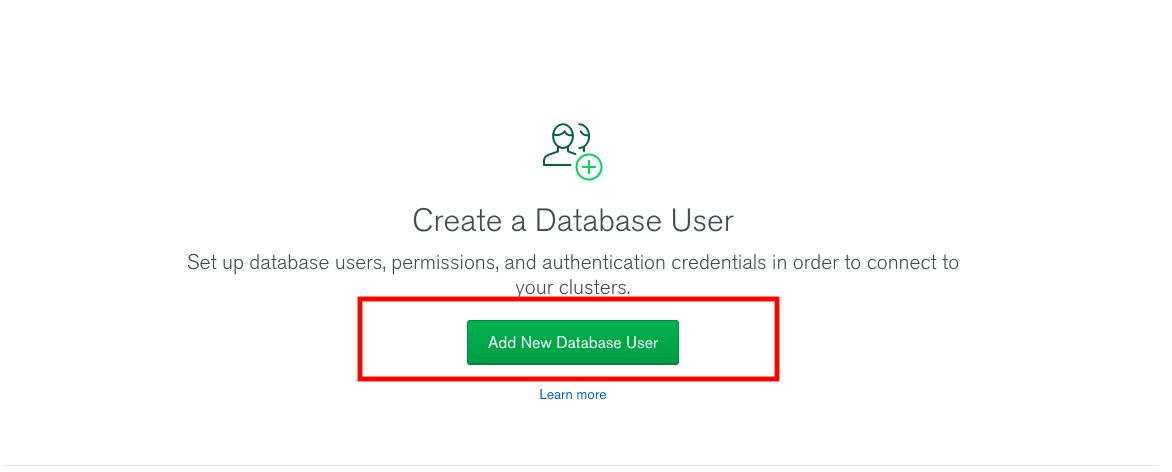 Click add new database user
Now, We have to whitelist the IP’s from where we can access the database.
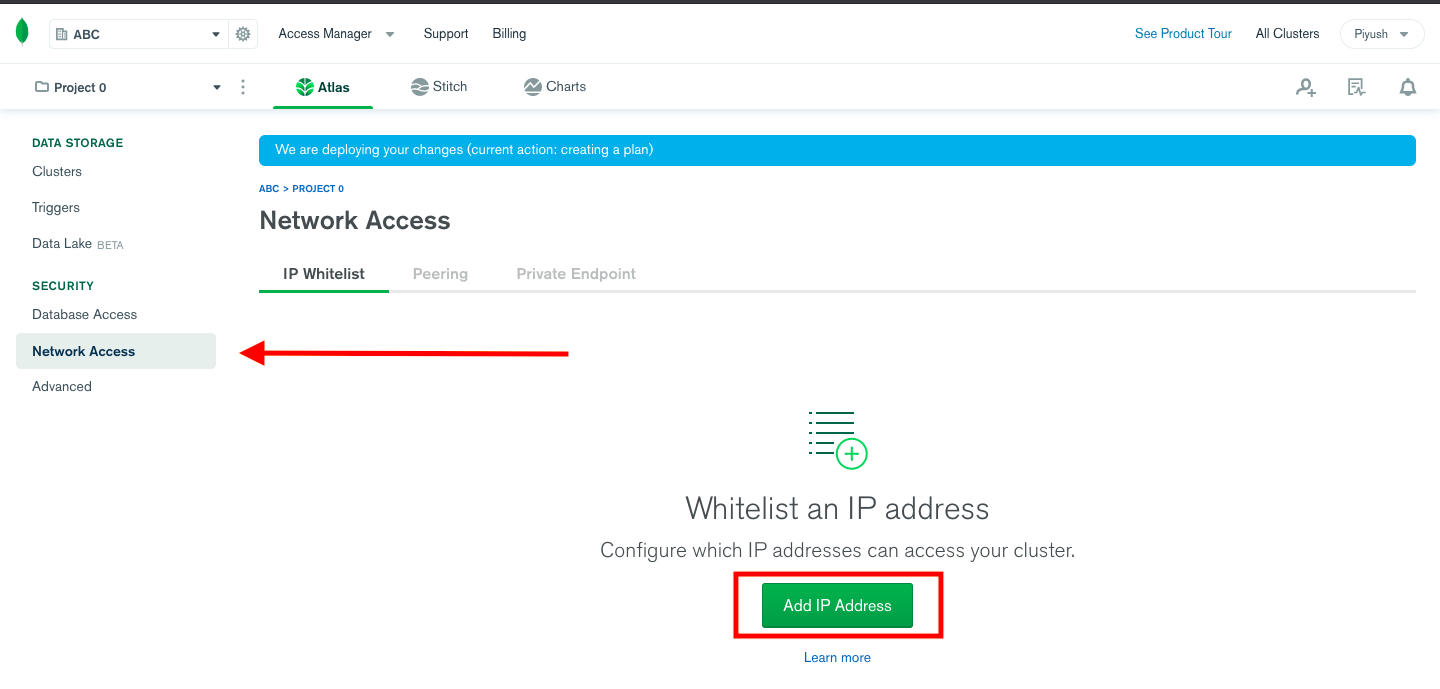 Navigate to Network access and click Add IP Address
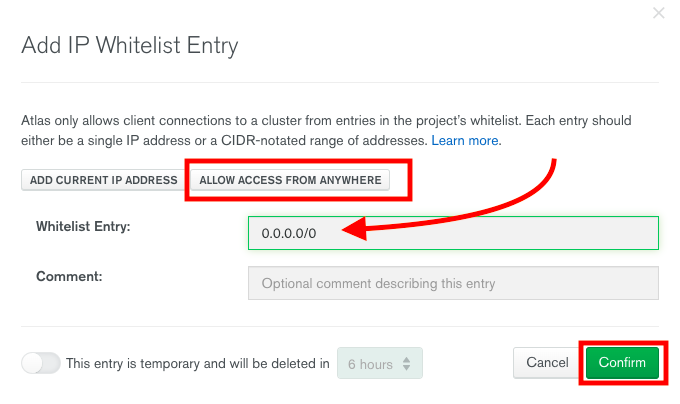 Select Allow Access from anywhere and select confirm
Step 2: Project Setup
Now, lets set up our project structure and create boilerplate code.
Firstly, create a folder. Let's name it as “myProject”.
Now, Fire-up your terminal or command prompt and run:
npm init
Great, Now let's install dependencies.
Run:
npm i express mongoose
Great Going, Now let's create some files and folders. For the time bear with me and create these folders. I am going to explain the working of each and file step by step.
Our Project Structure:
myProject
|
|- model
     |- user.js
|- index.js
|- package.json

In the above project structure, we have created a folder model, this is the folder where we are going to keep all our schemas for different collection.
Currently, we have one, the user.js
Step 3: Creating the Boilerplate Code
Head over to index.js and code along with me.
const express = require('express');

const app = express()

app.get('/', (req, res) => {
  res.send('Welcome to my API');
})

app.listen(9000, () => console.log('Server Started at PORT 9000'))
Step 4: Connect our node application to MongoDB Atlas
Connecting application to MongoDB is really simple.
- Head over to Clusters panel and click connect.
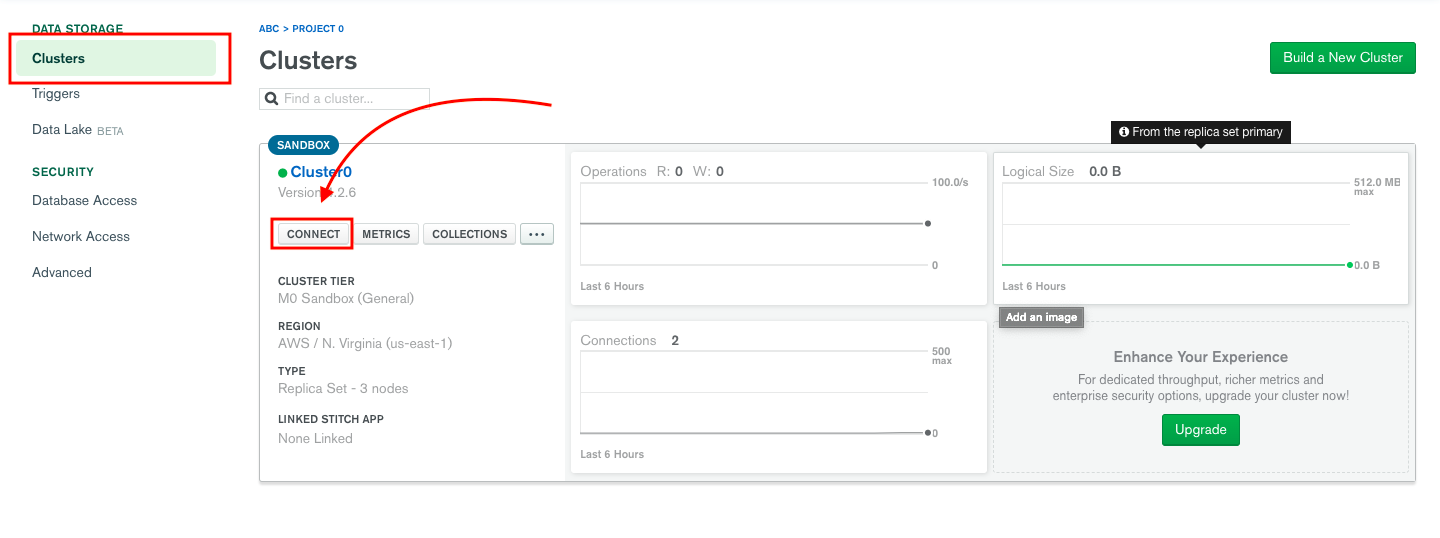
2. Click on connect your application.

3. Copy the connection string

Great Now back to our code …..
Follow the steps below to connect to MongoDB Atlas
- Import the mongoose package in index.js
const express = require('express');
const mongoose = require('mongoose');


const app = express()

app.get('/', (req, res) => {
  res.send('Welcome to my API');
})

app.listen(9000, () => console.log('Server Started at PORT 9000'))
- Use connect function of mongoose to connect to our application and pass the connection string that we copied earlier.
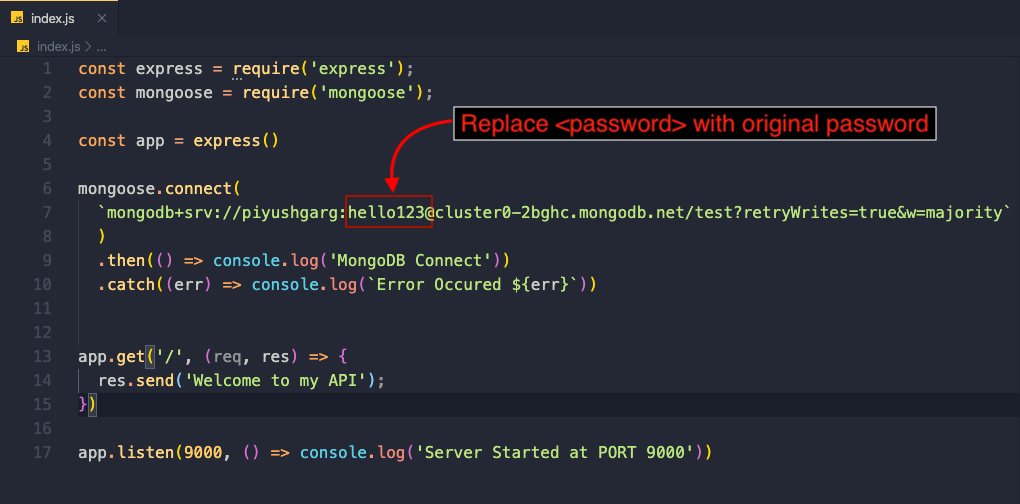 Replace the original password with <password>
const express = require('express');
const mongoose = require('mongoose');

const app = express()

mongoose.connect(
  `mongodb+srv://piyushgarg:hello123@cluster0-2bghc.mongodb.net/test?retryWrites=true&w=majority`
  )
  .then(() => console.log('MongoDB Connect'))
  .catch((err) => console.log(`Error Occured ${err}`))


app.get('/', (req, res) => {
  res.send('Welcome to my API');
})

app.listen(9000, () => console.log('Server Started at PORT 9000'))
Additionally, pass the following parameters to the connect function:
Refer to https://mongoosejs.com/docs/deprecations.html for more info
{

useNewUrlParser: true,

useUnifiedTopology: true

}
const express = require('express');
const mongoose = require('mongoose');

const app = express()

mongoose.connect(
  `mongodb+srv://piyushgarg:hello123@cluster0-2bghc.mongodb.net/test?retryWrites=true&w=majority`,
  {
    useNewUrlParser: true,
    useUnifiedTopology: true
  }
  )
  .then(() => console.log('MongoDB Connect'))
  .catch((err) => console.log(`Error Occured ${err}`))


app.get('/', (req, res) => {
  res.send('Welcome to my API');
})

app.listen(9000, () => console.log('Server Started at PORT 9000'))
Congrats! 🎉… try running the server and you would see MongoDB connected on the console.
Step 4: Creating user schema
In this step, we would be working with the user.js inside our models folder and create a user schema.
const mongoose = require('mongoose');

const userSchema = mongoose.Schema({
  name: {
    type: String,
    required: true,
  },
  email:{
    type: String,
    required: true,
    unique: true,
  },
  password:{
    type: String,
    required: true,
  },
  age: {
    type: Number
  }
})

const user = mongoose.model('users', userSchema);

module.exports = user;
In this file, we, first of all, require the mongoose package and then use the . Schema method to create the schema. In the Schema method, we pass an object specifying our schema of the user with various properties like type, unique and required.
Finally, we create a model using mongoose. model which requires two parameters:
First: The name of the model as a string. [ users ]
Second: The user schema we created above.
Hooray! User Schema Ready! Now we are ready to perform CRUD operations
Step 5: API and CRUD operations
In this step, we would be creating API's to perform crud operation on our DB.
Back to index.js
Import the user.js and start coding along with me.
const express = require('express');
const mongoose = require('mongoose');

const app = express()

const User = require('./model/user');

mongoose.connect(
  `mongodb+srv://piyushgarg:hello123@cluster0-2bghc.mongodb.net/test?retryWrites=true&w=majority`,
  {
    useNewUrlParser: true,
    useUnifiedTopology: true
  }
  )
  .then(() => console.log('MongoDB Connect'))
  .catch((err) => console.log(`Error Occured ${err}`))


app.get('/', (req, res) => {
  res.send('Welcome to my API');
})

app.get('/users/all', (req, res) => {

  User.find({}, (err, users) => {
    if(err) return res.json(err);
    return res.json(users)
  })

})


app.get('/users/:id', (req, res) => {

  const id = req.params.id;
  User.findById(id, (err, user) => {
    if(err) return res.json(err);

    return res.json(user);
  })
})

app.post('/user/new', (req, res) => {
  const {name, email, password, age} = req.body;
  const myUser = new User();
  myUser.name = name;
  myUser.email = email;
  myUser.password = password; // Make sure you hash the passowrd;
  myUser.age = age;

  myUser.save()
    .then(() => res.send('User inserted into db'))
    .catch(err => res.send(err))
})

app.listen(9000, () => console.log('Server Started at PORT 9000'))
There is one error in code and that is we have not implemented the express.json() middleware.
Well, that’s your task.
And Done! 😍
Let's test our implementation in Postman
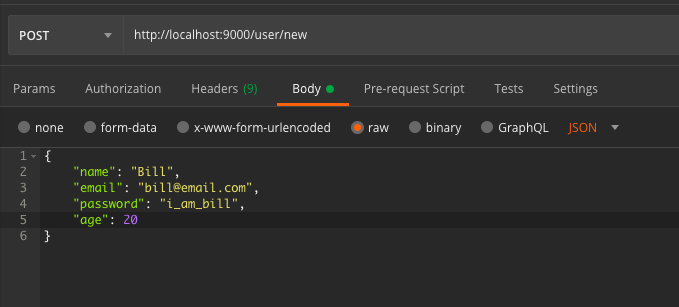

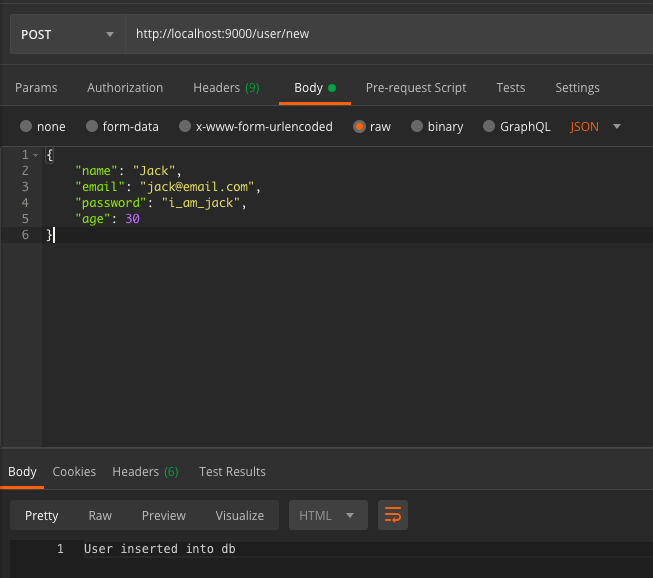
In your MongoDB Atlas go to collections and see your newly created user document there.
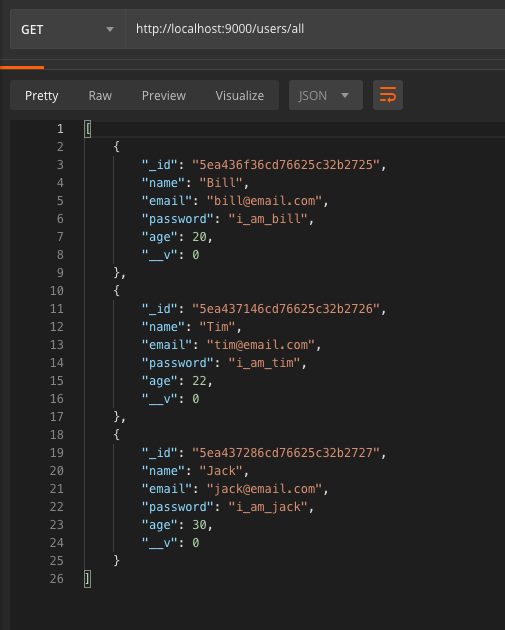

Great! 😍 Our API is working great.
Authentication in Nodejs using Passport.js In this article I would be teaching you authentication in nodejs using express and passport.jsmedium.com Building REST API with Node.js Build your own REST API from scratchmedium.com Top 10 visual studio code extensions 2020 Best vscode extensions to make your development smooth and powerful.medium.com Authentication in Nodejs using JSON web tokens (JWT) Hey there, In this article, we would be learning how to implement authentication in nodejs using express and JWT aka…medium.com
Social Links:
Github: https://github.com/piyushgarg195
Linkedin: https://www.linkedin.com/in/piyushgarg195/
Website: https://www.piyushgarg.dev/
Comments
Join the discussionNo comments yet. Be the first to comment.


