
Authentication in Nodejs using Passport.js

Hello once again, In this article I would be teaching you authentication in nodejs using express and passport.js
I know working with passport.js is a little bit tricky and confusing, but trust me I'll make it really simple.
I would highly recommend you to code along with me to better understand the flow of the code.
Note: Before we begin I would like you to understand the term “Strategy”
Passport uses what is termed strategies to authenticate requests.
Like authenticating with username and password is a strategy, authenticating with google or Facebook is a strategy.
So the strategy is a way to authenticate a user.
In this tutorial, we would be using the username and password authentication known as a local strategy in terms of passport.js
Step 0: Project setup and Installing dependencies
First of all, Create a new folder, let’s say “myApplication” and open your terminal or command prompt in that folder.
After opening your terminal or command prompt run the following command to initialize your node application.
npm init
After successfully creating your JSON file, now we are ready to install the following dependencies:
express
express-session
passport
passport-local
Install the above dependencies by typing following command:
npm install express express-session passport passport-local
Now, Our project is set up and we are ready to move to the next step.
Step 1: Creating a Boilerplate Code
Lets now create index.js and write the boilerplate code for the express app.
const express = require('express');

const app = express();


app.get('/', (req, res) => {
  if(req.isAuthenticated()){
    res.send(`Heyyyy ${req.user.email}`)
  }else{
    res.send('Whooo Areee youuuuuu ???')
  }
});

app.post('/login', (req, res) => {
  // ...
})

app.listen(9000, () => console.log(`Server Started at PORT 9000`))
So, I hope that you have got an idea that what we are going to implement.
In the above code we have two routes:
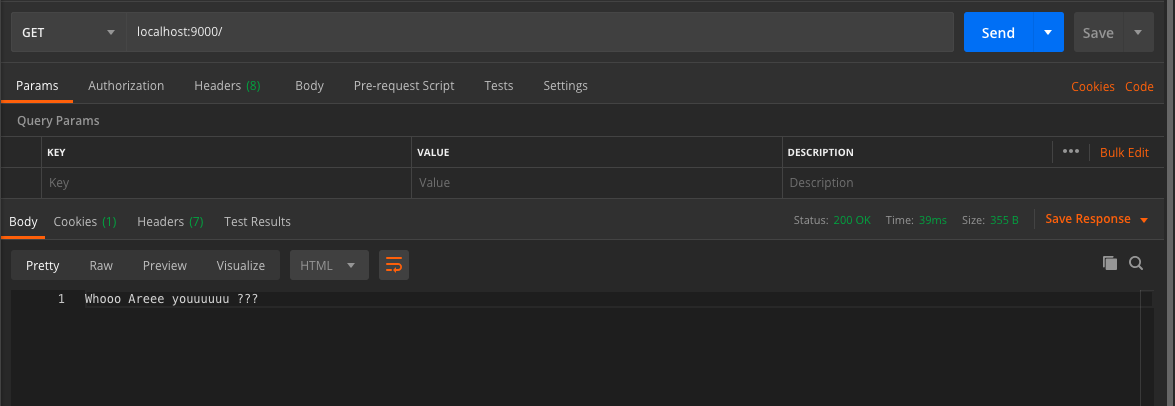
Home Route ‘/’: This route checks if the req.user is present, which means the user is logged in and sends heyy and email if so, else it sends a response saying Heyy how are you?.
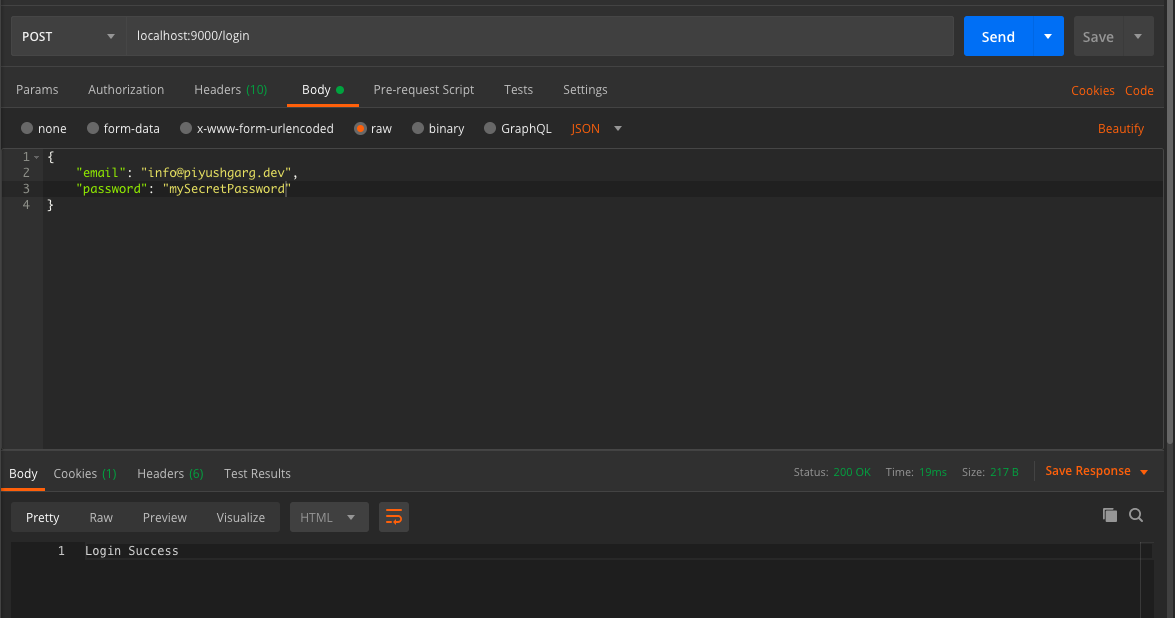
Login Route ‘/login’: This route is a route that we need to implement later. This route is responsible for logging in the user.
Now, in the next step, we would be implementing some middleware functions which we need to authenticate the user.
Step 2: Implementing Middleware functions
To authenticate our user using passport we need to implement the following middleware functions:
express-session() — Maintaining Sessions
passport.initialize() — Initialize Passport.js
passport.session() — Using Passport Sessions
With that being set lets import and implement them.
const express = require('express');
const passport = require('passport');
const session = require('express-session');

const app = express();


app.use(session({ secret: 'mysecret', resave: true, saveUninitialized: true }));
app.use(passport.initialize())
app.use(passport.session())

app.use(express.json())

app.get('/', (req, res) => {
  if(req.user) {
    res.send(`Hey There.... You are ${req.user.email}`)
  }
  else{
    res.send('Hey.. I dont know who are you??? ')
  }
})

app.post('/login', passport.authenticate('local'), (req, res) => {
  res.send('Loggin Sucess')
})


app.listen(9000, () => console.log(`Server running at 9000`))
Okay, With that being set let's move to next step.
Step 3: Code the passport.js
In this step, we would be coding the logic part of passport.js which is really simple.
Step 1: Create a file named as passport.js in your project root directory.
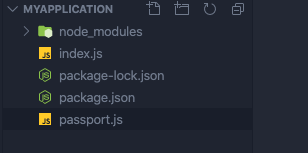
Step 2: Import passport-local Strategy
const LocalStrategy = require('passport-local').Strategy;
Finally exporting a helper function that accepts passport as a parameter and configures it as a local strategy for us.
It okay for now if you didn't understand the above line.
So our passport.js would look something like this:
const LocalStrategy = require('passport-local').Strategy;

module.exports = function(passport){
  passport.use(
    new LocalStrategy({usernameField: 'email', passwordField: 'password'}, (email, password, done) => {
      // ... do the database stuff with email and passsword and get all the details
      // of user. In this case I am hardcoding the user.
      const user = {
        email
      }
      if(user){
      done(null, user);
      }
      else{
        done(null, false, {message: "Incorrect Password"});
    })
  )
}
Let me simplify the above code
In the above code, we are exporting a function that takes passport as a parameter(line #3), After then it calls the use method on the passport that we get from the parameter and passes a new instance of the strategy we want to use (local strategy in this case, the one we imported on the top).
The LocalStrategy instance which is being passed to passport.js(line #5) takes in two parameters:
Options: We are passing an option{usernameField: ‘email’, passwordField: ‘password’}, which means that the user would provide his username with a field named as email and password with field named as password.
callback function: The second argument is a callback function which has access to 3 parameters:
email: Email Id of the user
password: Password of the user
done: We call the done function after we process our logic with email and password to call next middleware.
If we found the user from database and we match the password we call done function with the first parameter as null and second as user object.
done(null, user);
If we could not found the user or the password is wrong we call the done function as:
done(null, false, {message: "Incorrect Password or no user found"}
Step 4: Completing our login route
Before we complete our login route we need to configure our passport js with the help of function we just created in the previous step.
Back to index.js
const express = require('express');
const passport = require('passport');
const session = require('express-session');

const app = express();

// Configure the Passport JS
require('./passport')(passport);

app.use(session({ secret: 'mysecret', resave: true, saveUninitialized: true }));
app.use(passport.initialize())
app.use(passport.session())

app.use(express.json())


app.get('/', (req, res) => {
  if(req.isAuthenticated()){
    res.send(`Heyyyy ${req.user.email}`)
  }else{
    res.send('Whooo Areee youuuuuu ???')
  }
});

app.post('/login', (req, res) => {
  // ...
})

app.listen(9000, () => console.log(`Server Started at PORT 9000`))
After we configure the passport, lets now complete our login route
app.post('/login', passport.authenticate('local'), (req, res) => {
  res.send('Login Success')
})
Yeah! That's it. Your Login route is ready.
The passport.authenticate(‘local’) would call the function we exported from passport.js and pass the email and password to the Local Strategy we created.
If everything goes well, passport then called the next middleware that is our req, res function where we send a response saying login success.
Last Step: Serialize and Deserialize the user
Don’t panic! Serialising and the deserializing user simply means that every time the user makes a request to the server we need to parse the incoming user and set the user value to the req.user object.
const LocalStrategy = require('passport-local').Strategy;

module.exports = function(passport){
  passport.use(
    new LocalStrategy({usernameField: 'email'}, (email, password, done) => {
      // ... do the database stuff with email and passsword and get all the details
      // of user. In this case I am hardcoding the user.
      const user = {
        email
      }
      if(user){
      done(null, user);
      }
      else{
        done(null, false, {message: "Incorrect username"});
      }
    })
  )


  passport.serializeUser(function(user, done) {
    done(null, user.email);
  });


  passport.deserializeUser((email, done) => {
    // Find user by the email from your db
    const user = {
      email,
      name: 'Piyush', // In future, this value would come from your db
    }
    done(null, user)

  })
}
Every time the user makes a request to server firstly the Serialize user gets called which has the user that we created before. (passport.js line number #12).
Then this function further calls the deserialize user in which we set the req.user and pass the control to next middleware.
Congrats! You have learned how to implement authentication using Passport.js
Let's test our implementation in Postman
 Authentication in Nodejs using JSON web tokens (JWT)
Hey there, In this article, we would be learning how to implement authentication in nodejs using express and JWT aka…medium.com
Building REST API with Node.js
Build your own REST API from scratchmedium.com
Top 10 visual studio code extensions 2020
Best vscode extensions to make your development smooth and powerful.medium.com
Authentication in Nodejs using JSON web tokens (JWT)
Hey there, In this article, we would be learning how to implement authentication in nodejs using express and JWT aka…medium.com
Building REST API with Node.js
Build your own REST API from scratchmedium.com
Top 10 visual studio code extensions 2020
Best vscode extensions to make your development smooth and powerful.medium.com
Social Links:
Github: https://github.com/piyushgarg195
Linkedin: https://www.linkedin.com/in/piyushgarg195/
Website: https://www.piyushgarg.dev/


